
Widgets
Widgets are a convenient way to display estimated delivery dates in your store.
Widgets can be added to various pages and sections, for example, on product pages, in collections, and in the shopping cart.
Themes with support for app blocks (Online Store 2.0) can integrate widgets in the Shopify theme editor via the Delm Widget block. Alternatively, widgets can also be integrated by adding the app block code to Liquid templates.
Creating widgets
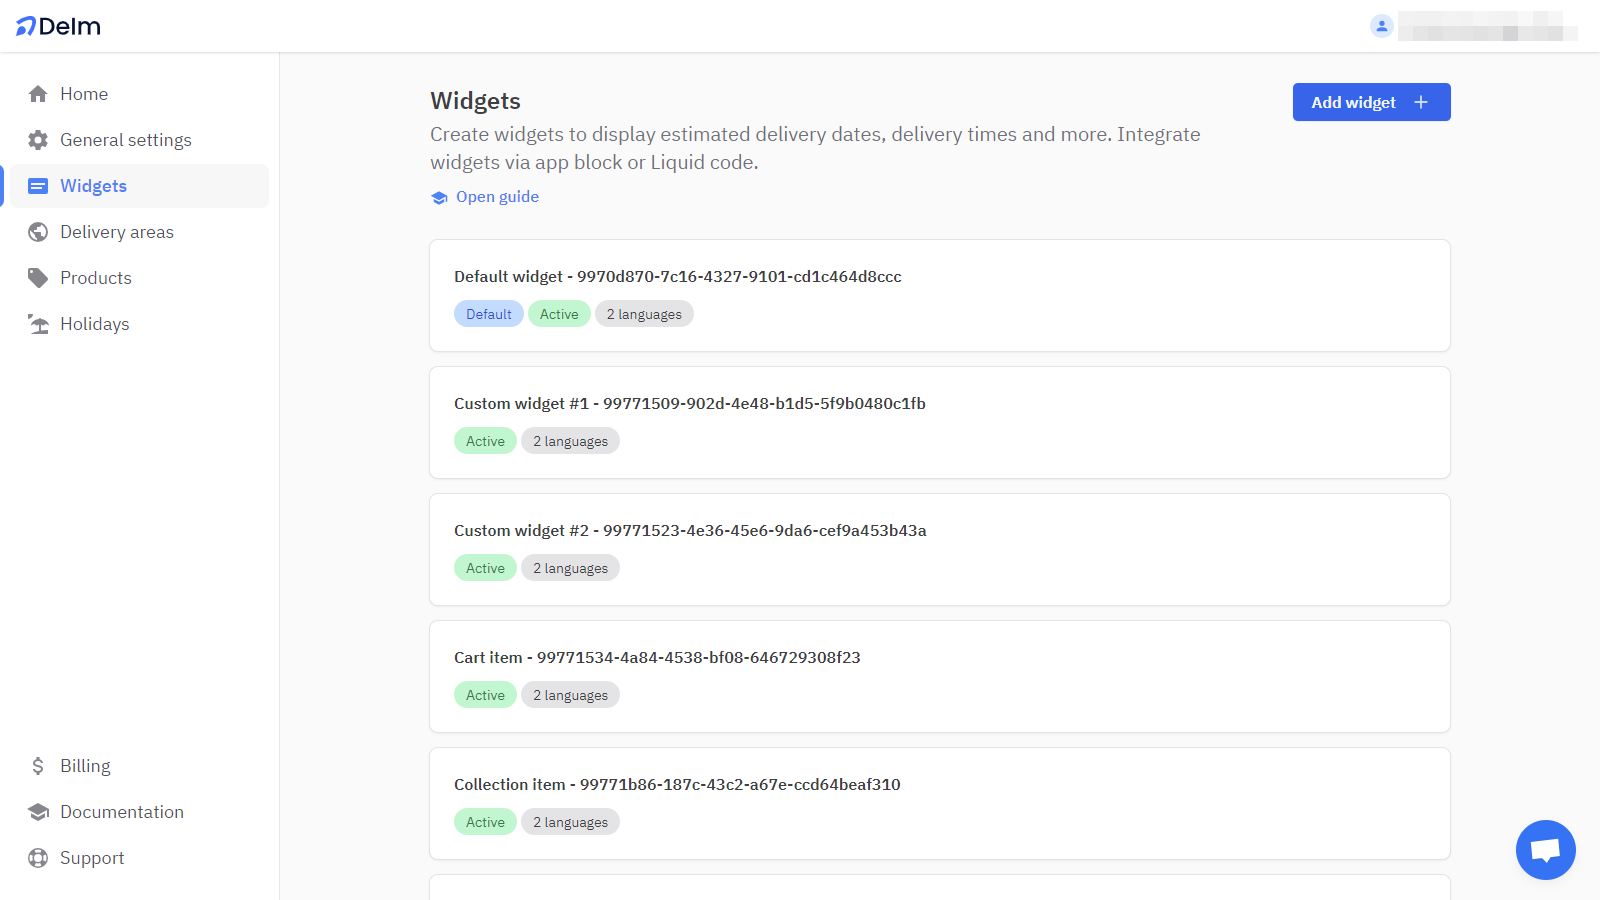
In Delm, you can create as many widgets as you want to cover different use cases. Here are some possibilities:
- Customize a detailed widget for your product page, showcasing all the relevant information.
- Design a simplified widget for your cart and collection items, providing a concise view.
- Create multiple versions of a widget to conduct A/B tests, comparing different designs or content.

Widget ID
Every widget is assigned a unique and permanent ID that cannot be changed. This ID serves as a reference and allows you to load specific widgets in different areas of your store.
Your default widget can be loaded witout specifying the widget ID.
Widget status
The status of a widget determines its visibility to customers.
- Draft: Widgets in draft status are only visible when viewed through the Shopify theme editor. This allows you to preview and make changes to the widget without displaying it to your customers.
- Active: When a widget is set to active status, it becomes visible to customers.
Widget content
You have full control over the widget content. Every aspect of the content can be customized according to your preferences. The widget content can be edited separately for each language, which makes it perfect for multilingual stores.
To include dynamic content, such as the estimated delivery date, you can use placeholders like {delivery_date}. These placeholders can be easily inserted into the content fields of the widget. A comprehensive list of available placeholders can be found below each field.
Examples
Visit our demo store to see widgets in action and learn how they can be customized. The code for each example is available on GitHub.
Theme integration
You may integrate widgets either through the Delm Widget app block or by adding the app block code to Liquid templates.
App block
For Online Store 2.0 themes only
If your theme does not support app blocks, you can integrate widgets into Liquid templates.
With the Delm Widget block, widgets can be easily integrated via the Shopify visual theme editor, without the need for programming skills.
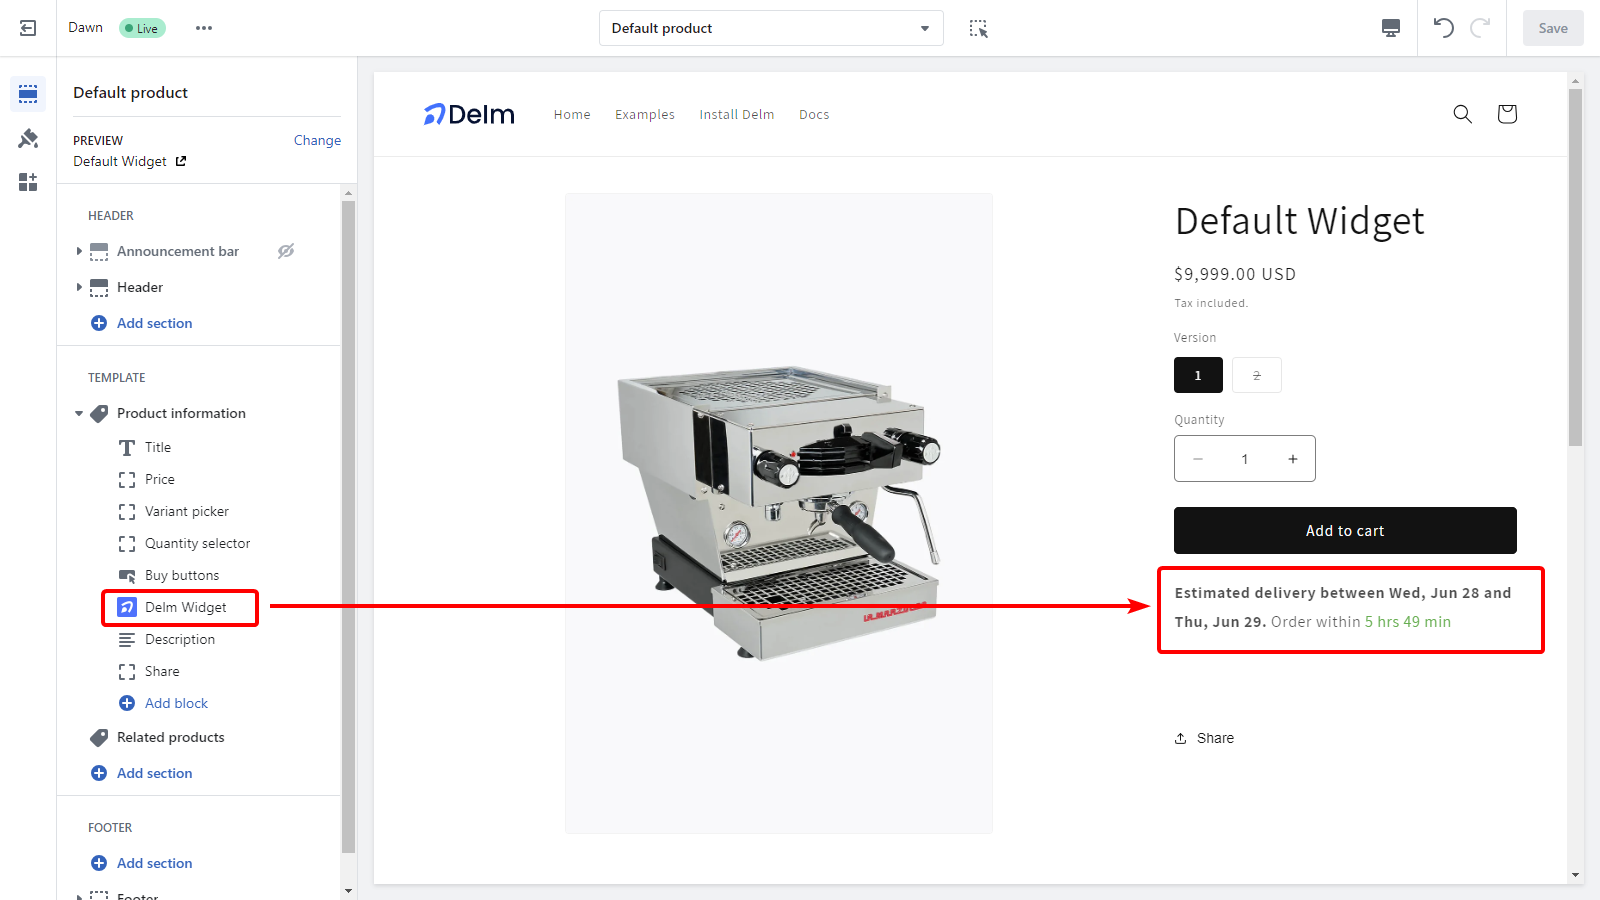
Please follow these steps:
- From your Shopify admin, navigate to
Sales channels>Online Store>Themes - Locate the theme you wish to edit and click on
Customize - Find the specific section of your store where you want to add the widget and click
Add block - Look for the
Delm Widgetblock in theAppssection - Remember to save your changes by clicking on
Save
However, please note that there may be positioning restrictions when using app blocks. These restrictions can be worked around by manually inserting the app block code into the Liquid template.
Liquid template
You may use the <delm-widget> HTML element to integrate widgets into Liquid templates.
Important
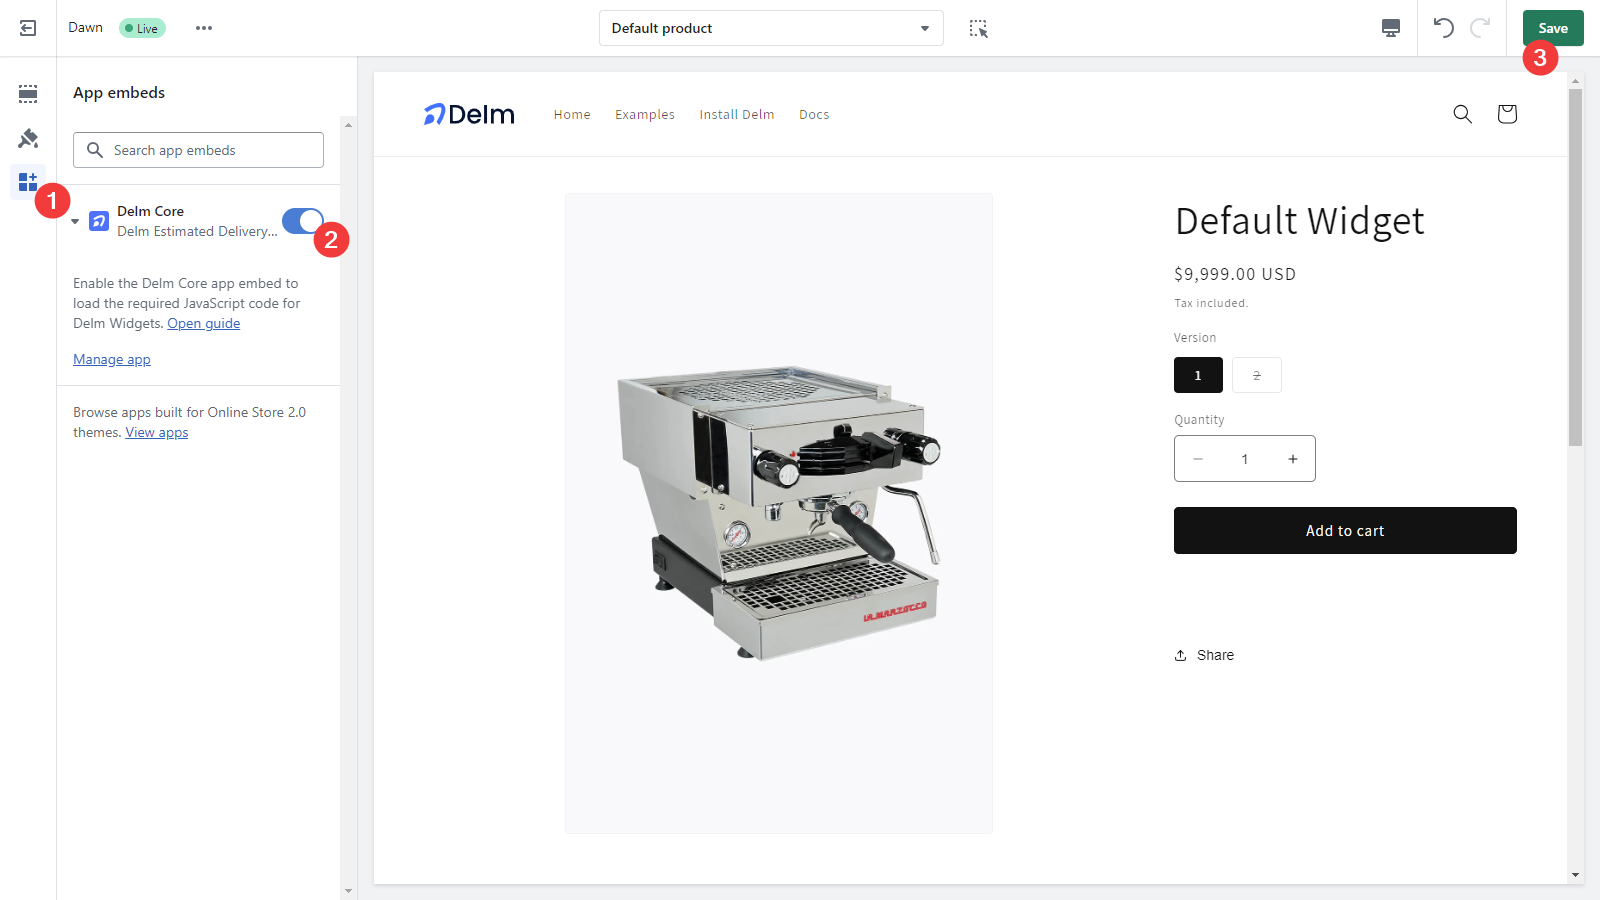
Please ensure that the Delm Core app embed is enabled in your theme settings:
- From your Shopify admin, navigate to
Sales channels>Online Store>Themes - Locate the theme you wish to edit and click on
Customize - In the customization panel, click on the
App embedstab - Enable the option for
Delm Core - Remember to save your changes by clicking on
Save
Code example
You can use the following code snippet to integrate widgets into your Liquid templates:
<delm-widget
  data-variant-id="{{ product.selected_or_first_available_variant.id }}"
  data-watch-variant-id-selector="{{ 'form[action*="/cart/add"] [name="id"]' | escape }}"
></delm-widget>
The name of the product object may vary depending on the context. Please ensure that the correct object is used to access the product information.
Supported element attributes
The following attributes are supported by the <delm-widget> element. All attributes are optional.
data-widget-idto load a specific widget using its unique ID.data-variant-idto link a product variant to this widget to display product specific data.data-watch-variant-id-selectorto update the widget when the active product variant changes. Provide the unique selector for the input element that holds the current variant ID.
Supported languages
If you need a language that is not listed below, please contact us.
| Language | ISO 639-1 |
|---|---|
| Arabic | ar |
| Bulgarian | bg |
| Chinese | zh |
| Croatian | hr |
| Czech | cs |
| Danish | da |
| Dutch | nl |
| English | en |
| Finnish | fi |
| French | fr |
| German | de |
| Greek | el |
| Hungarian | hu |
| Italian | it |
| Japanese | ja |
| Korean | ko |
| Latvian | lv |
| Lithuanian | lt |
| Norwegian | nb, nn, no |
| Polish | pl |
| Portuguese | pt |
| Romanian | ro |
| Slovak | sk |
| Slovenian | sl |
| Spanish | es |
| Swedish | sv |
Detecting store language
Delm uses the window.Shopify.locale JavaScript variable to determine the current language in your store. It reads the store language code and converts it to the ISO 639-1 standard.
For instance, if the store language code is en-US, Delm will convert it to en to represent the English language.
A/B testing widgets
To conduct A/B tests for widgets, you can use your preferred A/B testing tool like VWO. The process involves adding multiple widgets to your page and selectively showing them for different test variants.
Here's an example code snippet that demonstrates how to set up multiple widgets with easily selectable IDs:
{% assign variant_id = product.selected_or_first_available_variant.id %}
{% assign watch_variant_id_selector = 'form[action*="/cart/add"] [name="id"]' | escape %}

<div id="delm-widget-variant-a" style="display: none;">
  <delm-widget
    data-widget-id="enter-widget-variant-a-id"
    data-variant-id="{{ variant_id }}"
    data-watch-variant-id-selector="{{ watch_variant_id_selector }}"
  ></delm-widget>
</div>

<div id="delm-widget-variant-b" style="display: none;">
  <delm-widget
    data-widget-id="enter-widget-variant-b-id"
    data-variant-id="{{ variant_id }}"
    data-watch-variant-id-selector="{{ watch_variant_id_selector }}"
  ></delm-widget>
</div>

<!-- Add more variants as needed -->
In this example, each widget is enclosed within a <div> element with a unique ID. The style="display: none;" attribute ensures that all widgets remain hidden by default.
You can use the IDs of the widget containers to control the visibility of each widget through your A/B testing tool. This allows you to experiment with different variations and determine the most effective widget presentation for your customers.
